
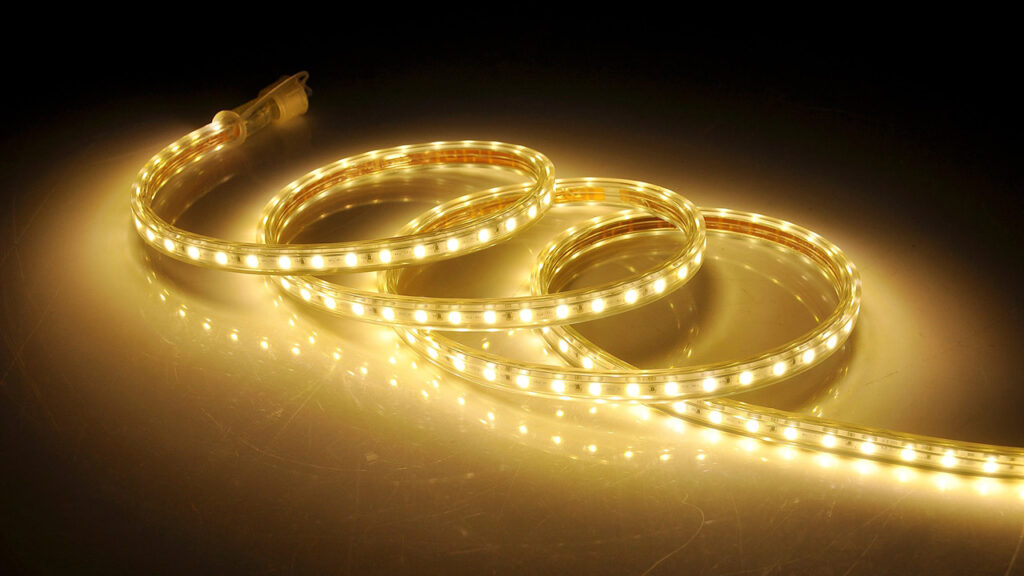
Browse our technical tips, decorative ideas and how to install LED light strips for ceiling, The difference between installing the RGB led strip lights and the monochrome strip lighting and how to install LED ceiling lights.
Let’s check some useful tips for how to install LED strip lights, monochrome and RGB LED strips ( 12 / 24V), which material is necessary to use. Let’s focus on flexible LED light strips that are very easy to install thanks to the 3M adhesive on the back of the strip that sticks to any surface.
As the LED light strips are flexible elements, they take up very little space, work with low voltage and offer a variety of colors and effects, allow plenty of lighting and decorative applications.
Lighting strips of white LEDs usually used in their cold and warm shades that can be assembled to achieve effects of direct and indirect light.
But if you want to combine the color with the light, so it’s the RGB LED strip lighting.
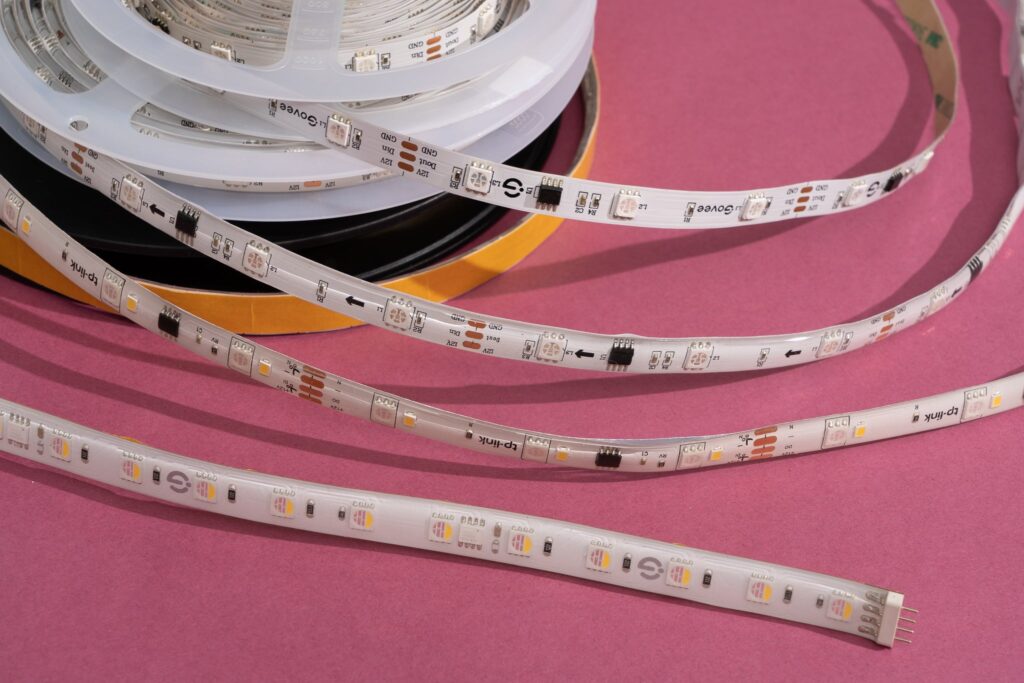
One of the great advantages of RGB LED strip lights is that we can make the size we need, and we can cut the strip to fit the required size or combine it with another RGB LED strip to make it longer for corners or curves.
You also may like the article of: Latest modern LED lights for false ceilings and walls
Basic steps of installing RGB LED strip lights
- Measure the space where you will install the RGB LED strip lights.
- Cut the proper length for the space where you are installing. Cut the strip from the sites marked by model.
- Clean the surface where you will install the LED strip lights, remove adhesive protector from the back and paste it into the selected area.
- Connect the end of the strip with a connector and this in turn to the power supply. If the length is sent to more than 8 meters, we have to install a power amplifier to reach good signal to the whole strip.
- The power supply of the strip will be as total watts (W) having the section we’re going to install. We must take into account the power of the controller and amplifier.
Cut the LED strip
Strips must always be cut by grid lines marked on the strip with scissors. The cuts will be made depending on the model of the LED strip . The remaining sections can still be used.
Welding the RGB LED strip lights
All divisible strips have marked lines to join them by welding. Be careful to keep the welder brief contact with the strip to weld, since excessive heat will damage the strip
Warranty Important notice
The division and welding of the strips is not covered by the guarantee since you are responsible. Cut strips and parts are also excluded from any warranty.
LED strip splicing sections
Depending on how is the situation do the joint, we will use a connector type or another. Joints may be:
- Linear strips when joints are made straight. There are rigid and flexible connectors for such joints.
- Angular to install the LED light strips in corners. This type of connector of splicing strips are welded on these occasions.
- Connectors for RGB LED strip lights have 4 pin (special few connectors can have up to 6 connectors), while the monochrome strips use pin connectors and strips of dual white use 3 connectors
When to use an amplifier to install LED strip lights?
In the installation of strips whenever we go to use a controller (monochrome or RGB) and the length is more than 8 meters, we will need an amplifier for every 8 meters to make the signal intensity reaches perfectly to the whole LED strip. Generally in the monochrome LED strips do not need to install a driver, but if we want to control the light intensity, we’ll need.
Installation examples for RGB LED strip lights
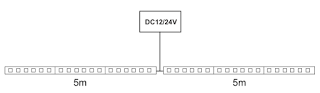
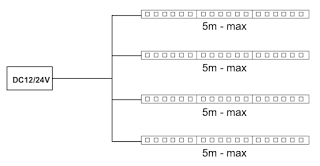
To avoid brownouts and to make the led strip lights equal in all sections, each section should not exceed 5 meters long. Between the power supply and LED light strip the maximum cable length is 3 meters. If necessary extend this length use a larger wire section to avoid voltage drops.
Check the technical specifications of the controller of the LED light strips to be used in the installation to know the maximum meter strip that the controller can support.
Installing monochrome LED light strip with power supply
How to install 4 LED light strips in parallel
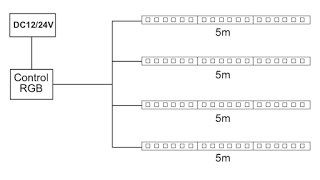
Installing of 4 LED strips forming square
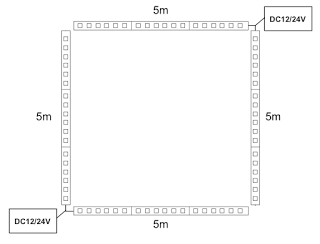
installing of following RGB LED strip lights

How to install 4 RGB LEDs in parallel
Installing more than 20m of RGB LED strip lighting case 1
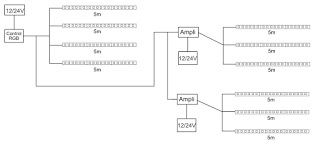
Installation of RGB LED strip lights more than 20 m
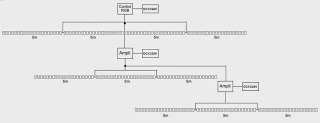
How to install LED light strip, LED ceiling lights
Step by step how to install LED light strips for ceiling
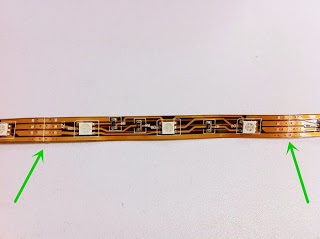
If you watch closely the light strip, you can find that there are all two inches line that can be cut. Between every two inches, it is a complete circuit.
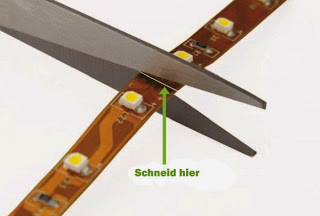
Then you can go ahead and start to cut the LED light strip. Cutting the strip along the line with a pair of scissors as long as you want. From 2 inches to 16.4 feet, it is possible.
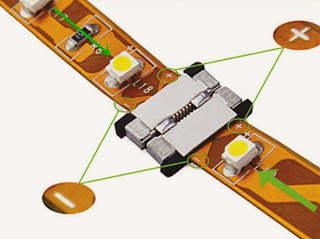
Third Step (How to connect two LED light strips):
It’s easy with a connector to connect two LED light strips. Be sure that you connected the anode and the cathode of the to the strips separately.
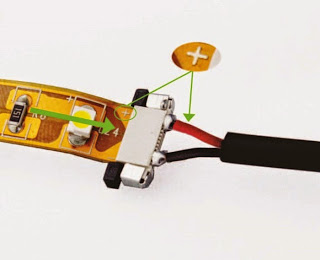
The forth step for how to install the LED ceiling lights: Close the RGB LED strip lighting to the power supply through a connector with DC connector. Make sure that the red wire in the positive direction.
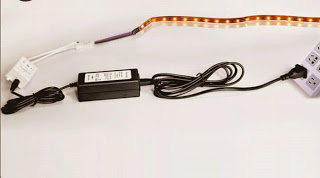
The LED light Strips requires 12V DC, so its a 12V DC power adapter shall use it.

Now we finished our steps of how to install LED light strips on your ceiling, Turn on the power supply and enjoy your LED strip light!

Now refresh your rooms with LED strips embellish, for example under the cabinets or around the picture frame on the wall.
we recently shared:
Why Tree Pruning is Essential for Tree Health and Safety